Watch part 1 of how to make a simple celebration cake here
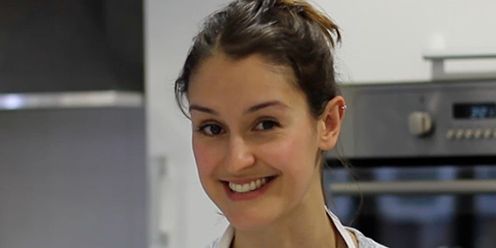
Acting cookery editor Suzannah Butcher takes you through all the steps you'll need to make a beautiful 3 tier celebration cake.
What to read next
Find our triple-tested celebration cake recipe in the June issue of Good Housekeeping, on newsstands 8 May 2014.
Step 5 : Stacking tiers
Start by placing the bottom layer of the tier you are working with on a thin cake board, exactly the same size. Use a cake lifter to slide the cake layers (already covered in butter icing and jam) on top of each other. Make sure the marks on the side of each cake layer line up to ensure that the two sides of each cut sponge fit back together evenly. Finish stacking with the most evenly-baked base you have reserved for the top of each tier. If the layers don't perfectly match, don't worry give them each a little turn until the tier looks even.
Step 6: Cake dowels
Dowelling rods are used in the base and the middle tiers to support the weight of the tiers above. Starting with the bottom tier, imagine where the middle tier is going to sit. Insert dowels into the bottom tier in a circle just smaller in circumference than the middle tier. Push them into the cake all the way down to the board. Press some into the centre for additional support.
Using a marker pen, mark the dowels 3mm (1/4in) above where they stick out of the cake. One at a time remove a dowel from the cake. Score around the mark with sharp scissors, snapping at the scored point. Insert each dowel back into its hole. Repeat.
Once you have cut your dowels to fit and they are all poking out of the cake, place a cake board on top of the cake to see if it sits relatively flatly on the dowels. Remove any incriminating dowels that are causing the board to feel uneven, replacing with new dowels and cutting to fit.
Step 7: Assembling
It's a good idea to transport tiers separately and assemble the cake in the place where it is going to be displayed and/or cut. With another pair of hands to help with lifting, use a sturdy cake lifter to pick up and slide the middle tier on top of the bottom tier. Carefully twist the cake until it looks even. Finish by lifting the top tier on top of the middle tier.
For the most even finish, use a small palatte knife to 'grout' extra buttercream in between the layers and smooth over. Dust the outside edges of the cake in icing sugar for a softened, vintage effect. Don't worry if your cake isn't perfectly perpendicular. Decorating with flowers and berries will draw the eye away from imperfections.
Click the links below for more triple-tested cake recipes and baking ideas:
Watch part 2 of how to make a simple celebration cake here
10 of the best triple-tested sponge cake recipes
Make your cake look stunning with advice from Stefi Jakab
15 of the best triple-tested baking recipes
Find our triple-tested celebration cake recipe in the June issue of Good Housekeeping, on newsstands 8 May 2014.
A crack team of highly skilled food content producers, the GH Kitchen Team are Good Housekeeping’s resident recipe developers and all-round food obsessives. GH Kitchen Director Sarah Akhurst is our resident hosting pro and loves nothing more than putting on a foodie feast for friends. Senior Cookery Writer Alice Shields is a former pastry chef and baking fanatic who loves making bread and would have peanut butter with everything if she could. Lover of all things savoury, Senior Cookery Writer Grace Evans can be found eating nocellara olives at every opportunity, and will take the cheeseboard over dessert any time. With a wealth of professional kitchen experience between them, they’re dedicated to ensuring every Good Housekeeping recipe is the best it can be, so you can trust they’ll work every single time.


